ACCESSORY-MU Handcrafted Jewelry, Crafts & Graphic Design
  • Home
  • Graphic Design
  • Blog
  • Published Work
  • GIF
  • Downloads
  • Terms of Use
  • About
  • Privacy Policy
  • Home
  • Graphic Design
  • Blog
  • Published Work
  • GIF
  • Downloads
  • Terms of Use
  • About
  • Privacy Policy

BLOG


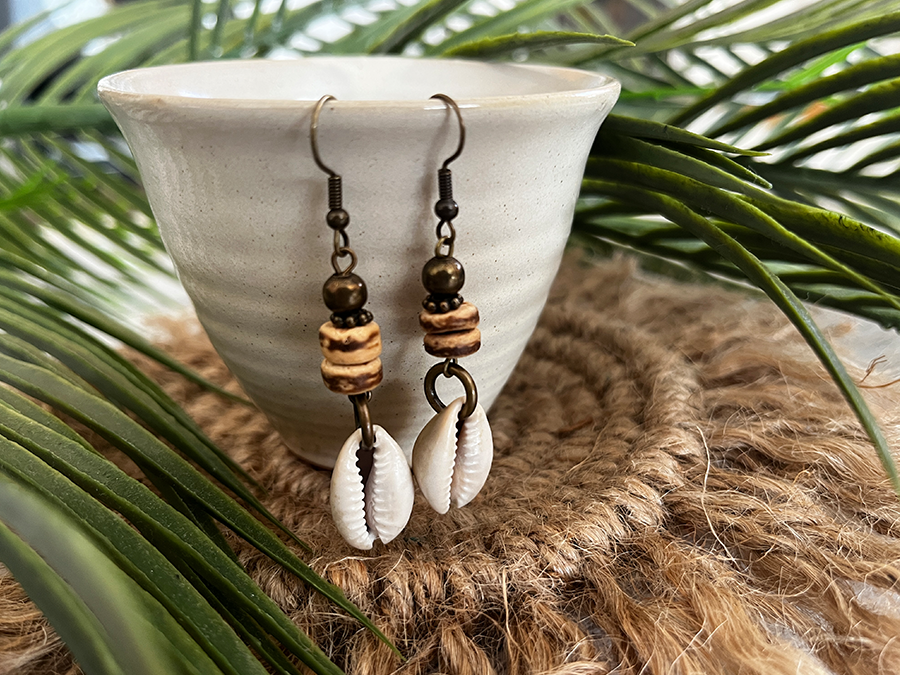
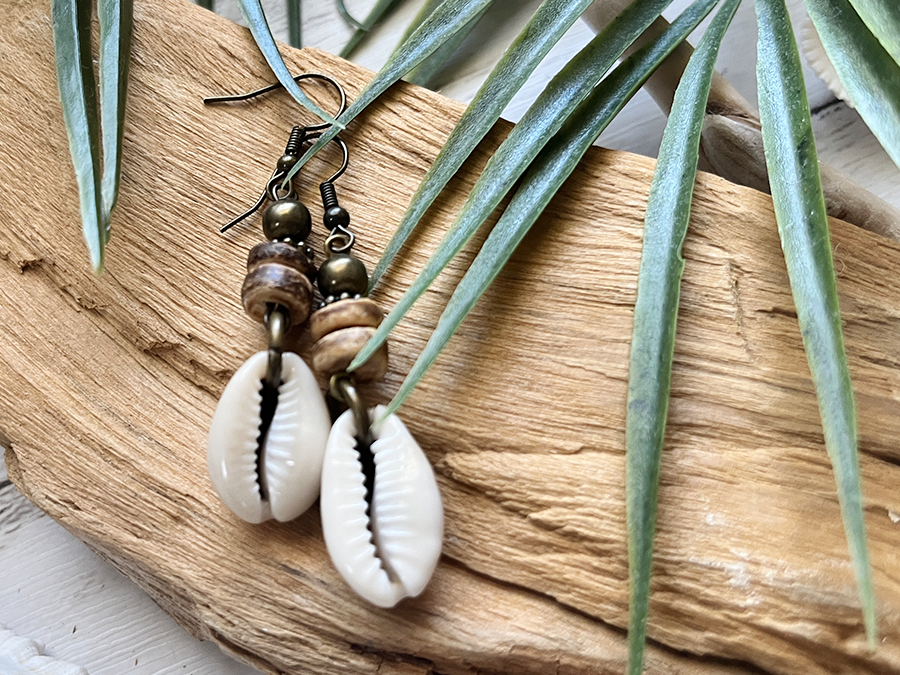
Unlocking Boho Vibes: Craft Your Own Earthy Cowrie Shell Earrings for a Beachy Summer Look

5/16/2023

1 Comment

 
Get ready to embrace the carefree spirit of summer and infuse your style with a touch of boho elegance! In this tutorial, I will guide you through creating your own cowrie shell earrings that perfectly capture the essence of beachy vibes. Whether you're aiming to make a fashion statement or seeking a unique accessory for a beachside getaway, these earrings will become your go-to choice. So, grab your tools and let's dive into this mesmerizing jewelry-making adventure that's bound to leave you with earthy cowrie shell earrings, evoking the spirit of endless summers and sun-kissed shores. Let the boho vibes inspire you as you embark on this beautiful crafting endeavor.

Check out my ETSY shop for the exact earrings used in this tutorial!
go to Etsy shop

Tools & materials for cowrie shell earrings
Tools & Materials:
  • Cowrie shells with a single drilled hole
  • Daisy metal spacer beads (4-5mm)
  • Earring hooks
  • Eye pins
  • Heavy gauge jump rings (9mm)
  • Metal round beads (6mm)
  • Natural wooden disc beads (8mm)
  • Pliers
  • Side cutters​
  • Bead reamer (if necessary)

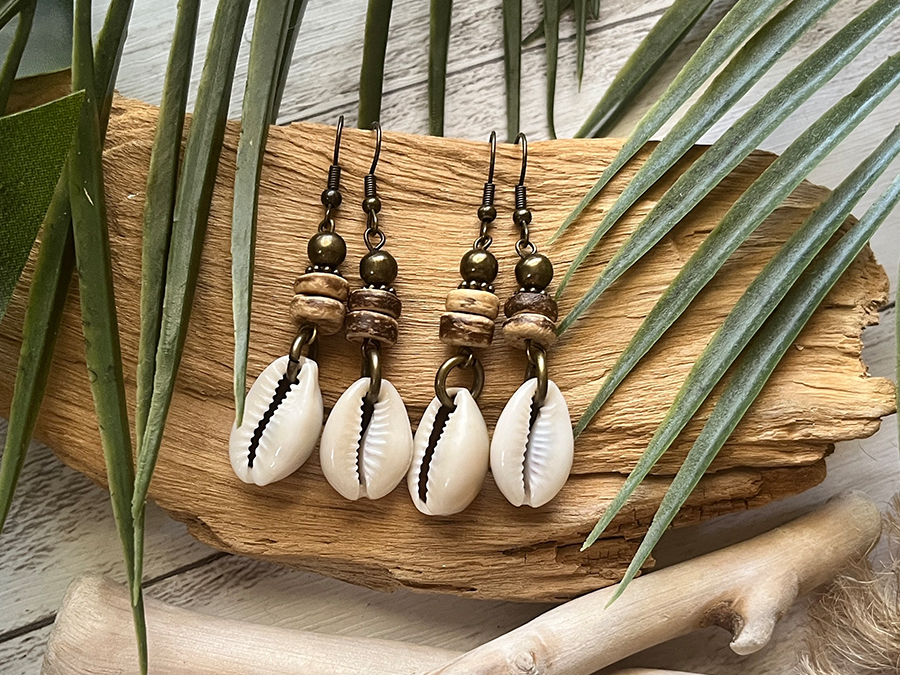
Making cowrie shell earrings
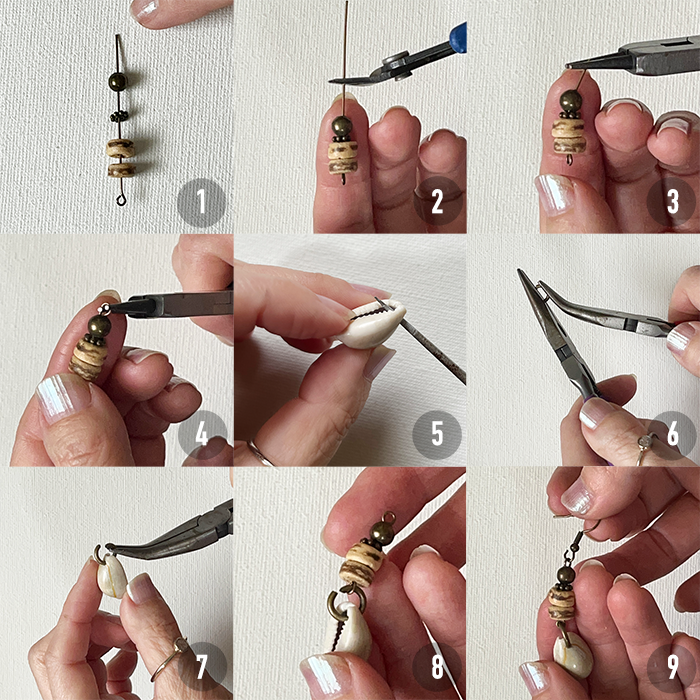
Step-by-step tutorial guides for cowrie shell earrings
​Instructions:
  1. Thread two wooden disc beads, one daisy spacer, and one metal bead onto an eye pin.
  2. Use side cutting pliers to cut the eye pin, leaving approximately 1 cm of wire.
  3. With pliers, create a small angle by bending the wire slightly at the end.
  4. Using round nose pliers, create a loop at one end of the wire.
  5. If the hole in the cowrie shell is too small for the jump ring, carefully enlarge it using a bead reamer or small round file. 
  6. Using pliers, open a 9mm heavy gauge jump ring.
  7. Attach the opened jump ring to the cowrie shell.
  8. Attach the eye pin loop to the heavy gauge jump ring attached to the cowrie shell, ensuring it is securely closed with pliers.
  9. Attach an earring hook (which also has an eye pin loop) to the top of the eye pin loop using pliers.
​
Repeat steps 2-9 to create a matching earring.

Once both earrings are complete, use pliers to adjust any loops or connections as necessary, ensuring the earrings hang evenly.

Please note that any crafts or DIY projects should be attempted with caution

Boho chic cowrie shell earrings artfully arranged on a pottery cup
Stylish cowrie shell earrings displayed with a tropical touch
Cowrie shell earrings showcasing boho beach vibes
1 Comment

DIY Concho Pendant: Add Boho-Chic Style to Your Jewelry Collection

5/3/2023

0 Comments

 
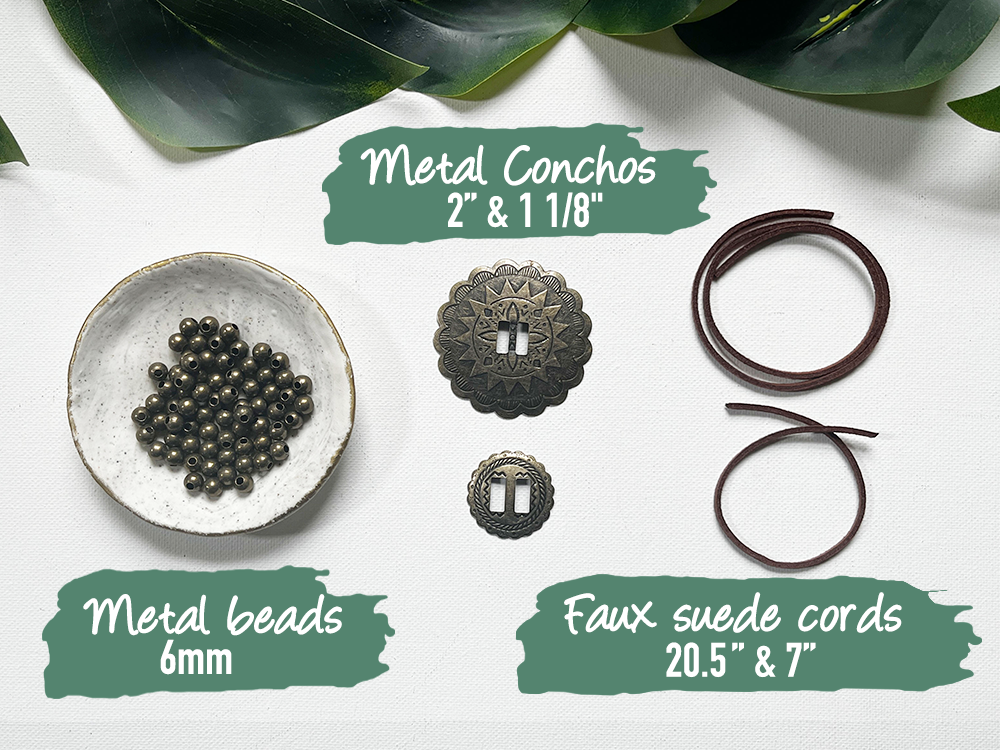
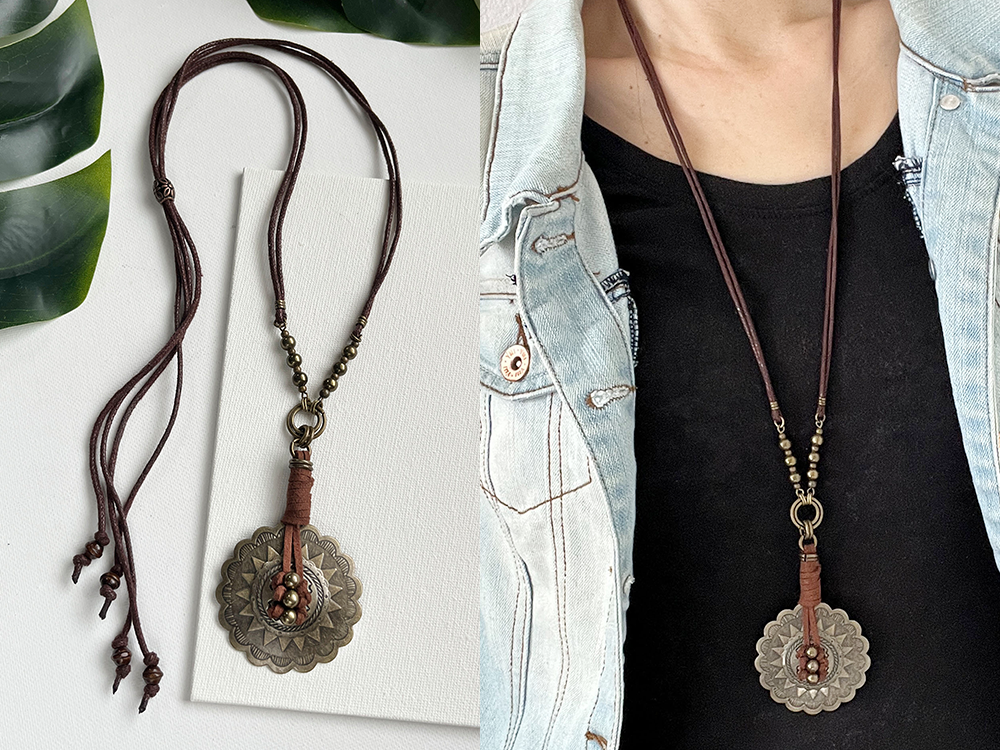
As an Amazon Associate I earn from qualifying purchases. Please read my Amazon Associates Program for more info.
Are you looking to add some boho-chic flair to your jewelry collection? Look no further than the DIY concho pendant! With just a few simple materials and some easy-to-follow steps, you can create a stunning pendant that will complement any outfit. In this tutorial, I'll show you how to make a beautiful concho pendant using faux suede cord, metal beads, and metal conchos. Grab your pliers and get ready to create your own unique accessory!

Check out my ETSY shop for the exact pendant used in this tutorial!​
GO TO ETSY SHOP

Materials for Concho pendant
Tools & materials for Concho pendant
Tools & Materials
  • Concho: Width: 1 1/8"-2", Color: Antique brass
  • Faux suede cord (Brown)
  • Fabric glue
  • Jump ring: heavy gauge, 9mm, 12mm, 15mm
  • Metal round beads: 6mm
  • Pliers
  • Scissros

Making a Concho Pendant
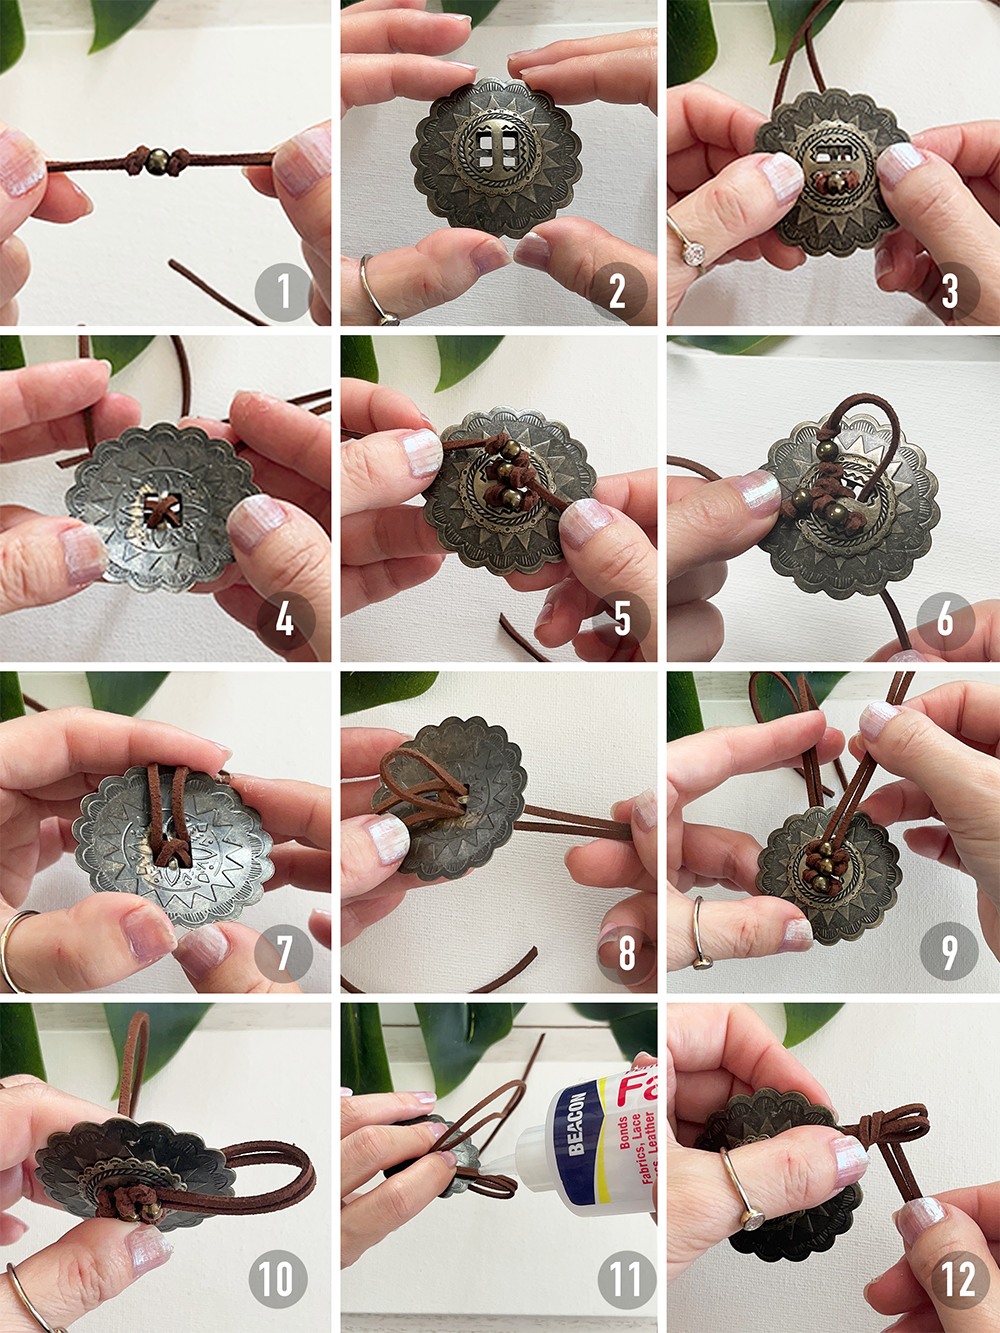
Picture
Instructions:
  1. Thread a metal bead through the 20.5” long faux suede cord until the midpoint. Make two knots to sandwich the bead between them.
  2. Layer the conchos to create a 4-hole concho pendant. Place the 2" metal concho with 2 large rectangle holes on the bottom, and the 1 1/8" metal concho with 2 large rectangle holes on top of the 2" concho. The holes on the top concho should be at a 90-degree angle to create 4 holes.
  3. Pass the cord ends through the holes from front to back.
  4. Flip the concho over, cross the cords, and pass the cord ends through the holes from back to front.
  5. Thread a metal bead onto each end of the cord. Make two knots to sandwich each bead between them.
  6. Pass the cord ends through the top two holes from front to back.
  7. Flip the concho over again.
  8. Take the 7” faux suede cord, pass the ends through the top two holes from back to front. 
  9. Pull the cord tight.
  10. Fold the cord in half from front to back.
  11. Apply fabric glue to the folded cord.
  12. Take the other 2 cords and wrap them around the folded cord. Use more fabric glue to secure the end, then cut the excess cord.
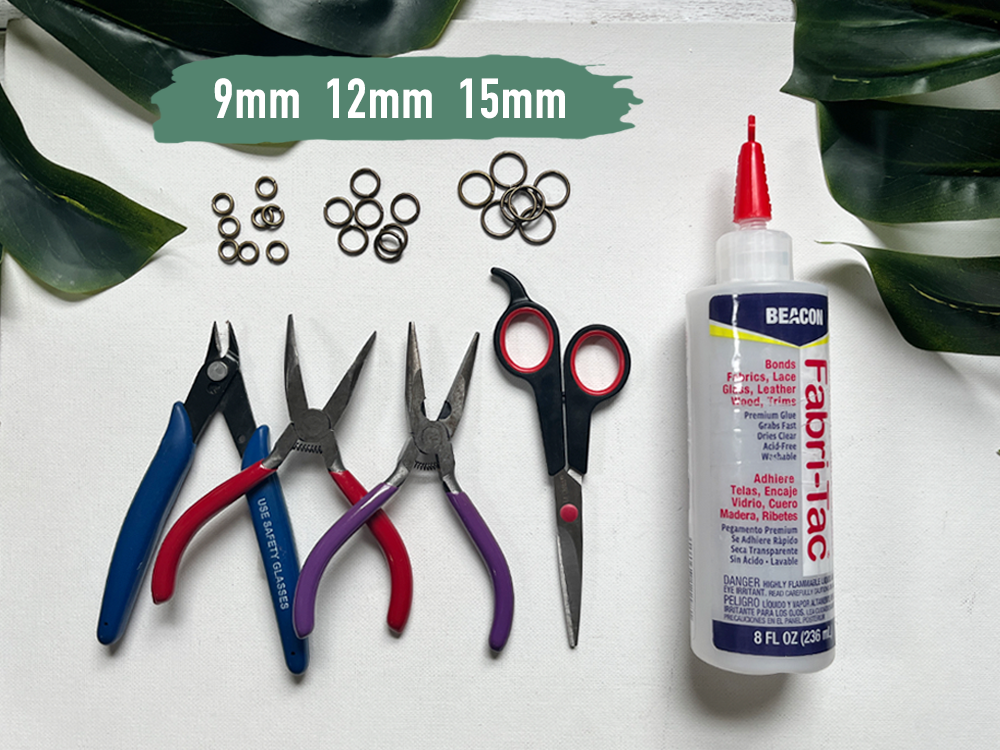
Attaching Heavy Gauge Jump Rings to the Concho Pendant as a Bail
Picture
Instructions:
  1. Prepare three 9mm heavy gauge jump rings.
  2. Thread two of the jump rings through the top of the folded faux suede cord of the concho pendant. Using pliers, open the third jump ring and attach it to the top loop of the faux suede cord.
  3. You have now created a simple bail for your concho pendant! If you want to add more jump rings, continue to Step 4.
  4. For a more layered look, layer a 12mm jump ring and a 15mm jump ring, and attach two 9mm jump rings separately to the layered rings using pliers.
  5. Use the pliers to attach the jump rings from Step 4 to the jump ring from Step 3.
  6. Your concho pendant now has a beautiful bail using jump rings!

​Please note that any crafts or DIY projects should be attempted with caution
I love this technique - it's a unique way to attach a bail to your concho pendant using jump rings. Not only is it easy to do, but it also adds an interesting dimension to your jewelry piece. Plus, you can customize it by using different sizes of jump rings to suit your style. Give it a try and see how it turns out!
Left: Long Concho pendant on waxed cotton cord, Right: Woman wearing Long Concho necklace
Concho pendant with waxed cotton cord
Left: Woman wearing Concho necklace, Right: Long Concho pendant on faux suede cord
Concho pendant with faux suede cord
Left: Long Concho pendant on metal necklace cord, Right: Woman wearing Long Concho necklace
Concho pendant with metal chain
0 Comments

    Author


    Picture

    Archives

    January 2025
    November 2024
    November 2023
    October 2023
    September 2023
    August 2023
    July 2023
    June 2023
    May 2023
    April 2023
    March 2023
    December 2022
    April 2022
    December 2021
    November 2021
    October 2021
    March 2020
    January 2020
    October 2019
    July 2019
    March 2019
    July 2015

    Categories

    All
    Jute Crafts
    Sustainable Crafts

    RSS Feed

Proudly powered by Weebly