
|
As an Amazon Associate I earn from qualifying purchases. Please read my Amazon Associates Program for more info Step into the realm of DIY jewelry with a creative twist. Today, we're diving into the craft of making your very own necklace, uniquely designed using yarn-wrapped wooden beads. This DIY necklace tutorial unveils the magic of transforming ordinary jewelry-making supplies and everyday materials, such as natural wooden beads, into handcrafted yarn beads. With just a handful of essentials including yarn and fabric glue, you'll unlock the art of crafting necklace that truly reflect your individuality. This tutorial uses yellow faux fur yarn, imparting a cozy and warm appearance. However, the beauty of this craft is its versatility. By choosing different colors or textures like red, blue, or any other variation, you can create a look and feel that's entirely your own. It's a fusion of warmth and elegance, making it ideal for both personal adornment and sharing the joy through handmade gifts. And if you want to take it a step further, check out another tutorial video on making matching yarn-wrapped ball earrings in the same style. Follow the link below to learn how to create these fun and vibrant accessories! "DIY Earrings Tutorial - Yarn-Wrapped Magic: Creating Unique Wooden Bead Earrings" https://youtu.be/6wG_2atVoYo 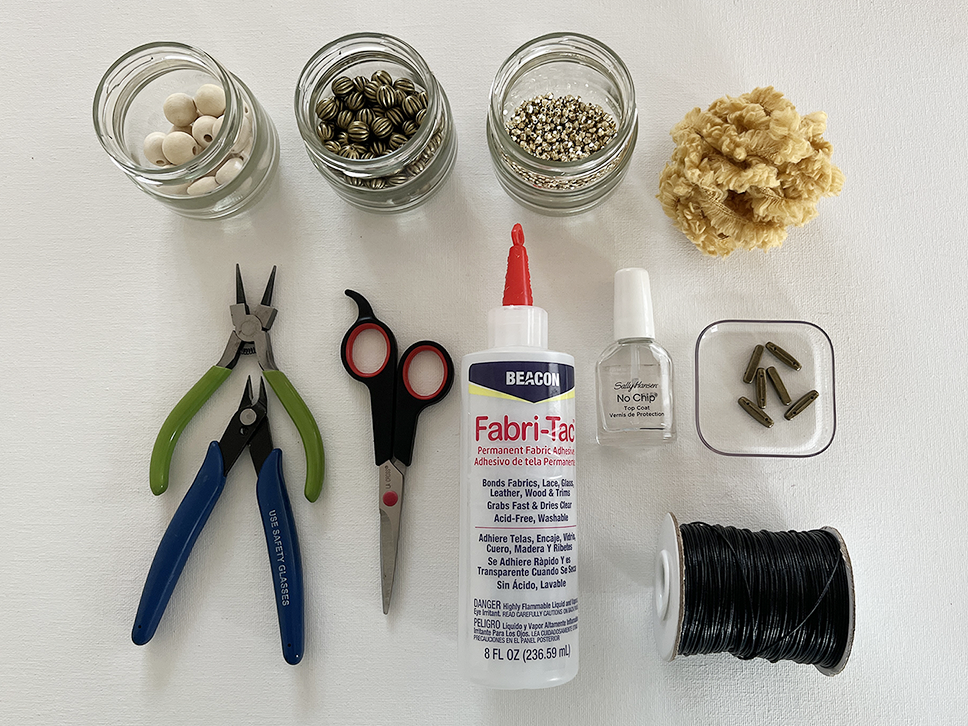 Supplies:
Creating Yarn Ball Beads 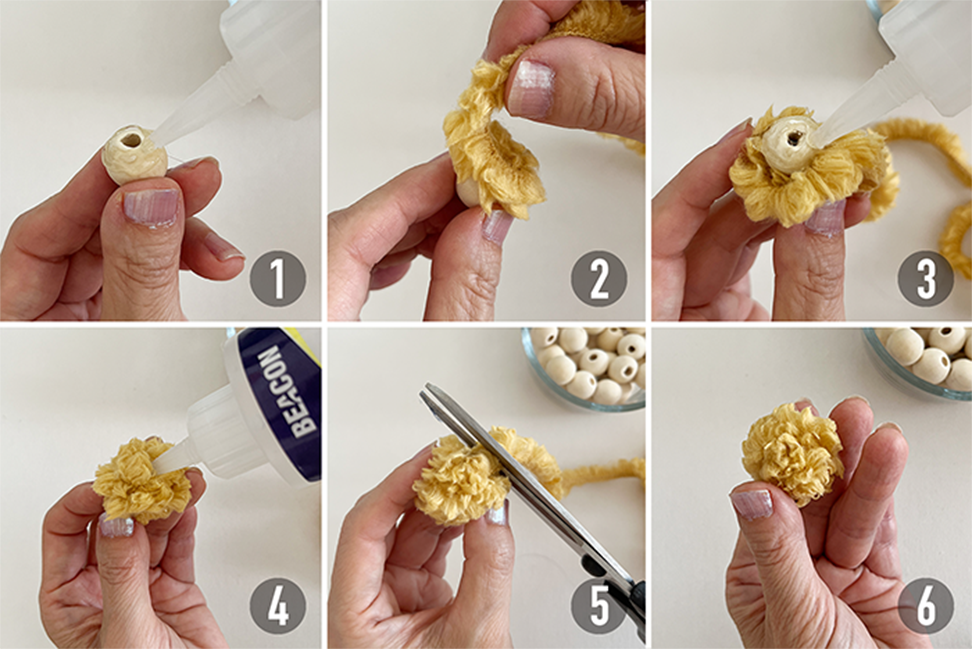 Instructions:
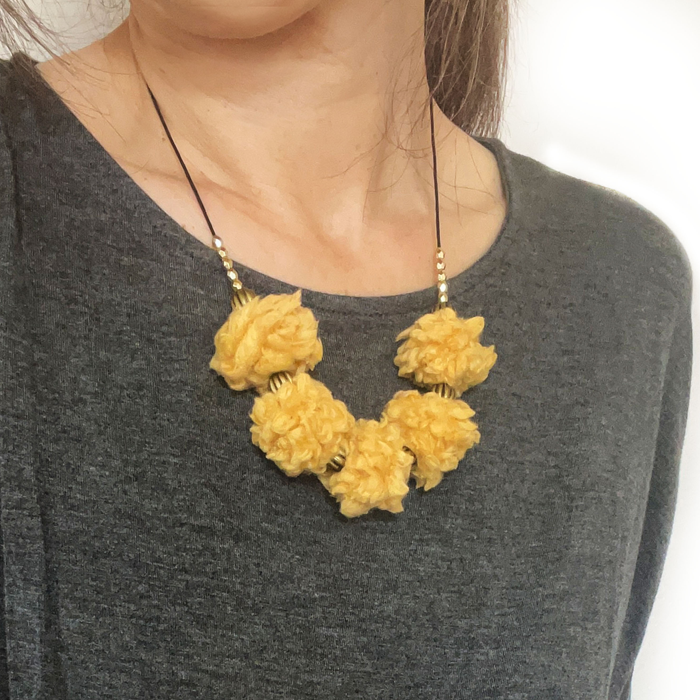
Assembling Adjustable Cord Necklace  Instructions:
Creating Bead Holes Safely If yarn has covered your bead holes, you can use a bead reamer or round-nose pliers to create an opening for the beads. When using a bead reamer or round-nose pliers, exercise caution to avoid injuring yourself. 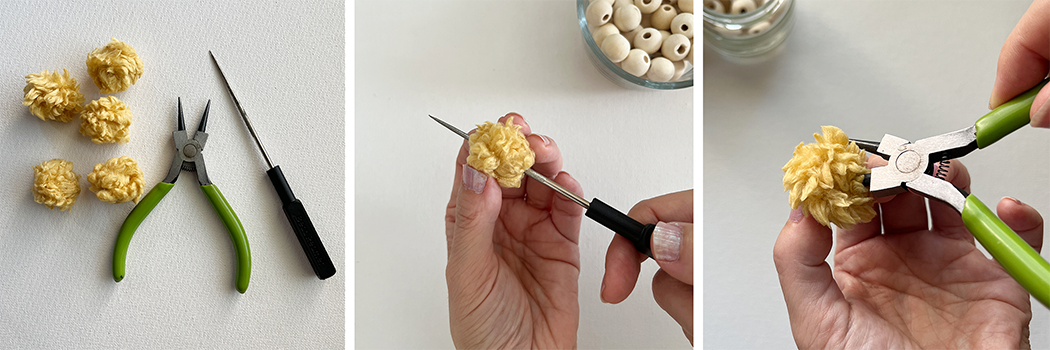 Preventing Cord Fraying (Optional)  Instructions:
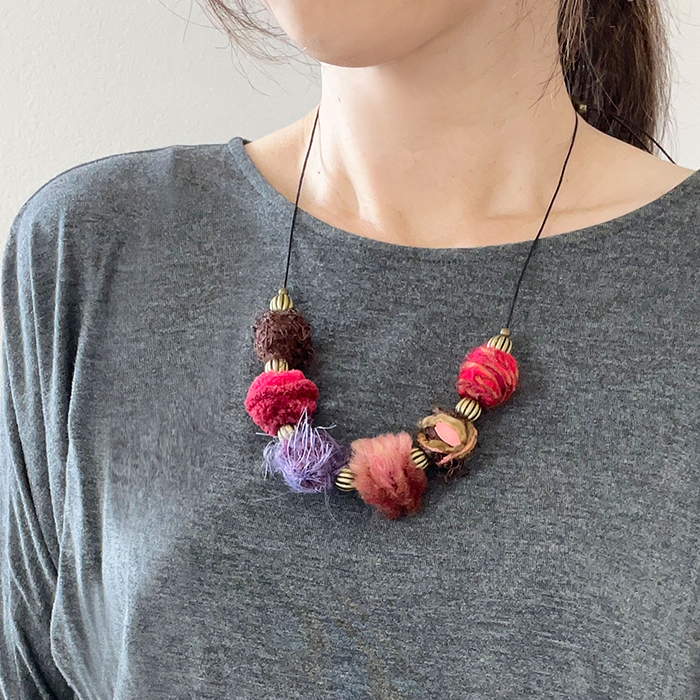
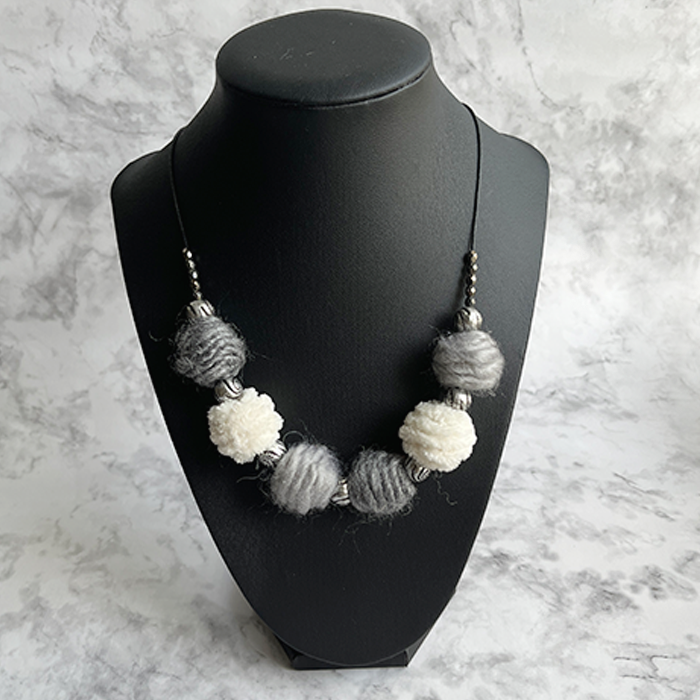
Please note that any crafts or DIY projects should be attempted with caution. Explore necklaces with the same style as yarn-wrapped bead necklaces, but with different colors and textures for a unique look.
0 Comments
Leave a Reply. |
Author
Archives
November 2023
Categories |
 RSS Feed
