ACCESSORY-MU Handcrafted Jewelry, Crafts & Graphic Design
  • Home
  • Graphic Design
  • Blog
  • Published Work
  • GIF
  • Downloads
  • Terms of Use
  • About
  • Privacy Policy
  • Home
  • Graphic Design
  • Blog
  • Published Work
  • GIF
  • Downloads
  • Terms of Use
  • About
  • Privacy Policy

BLOG


DIY Earthy Bracelet and Handmade Tags: A Fun and Affordable Project

3/26/2023

0 Comments

 
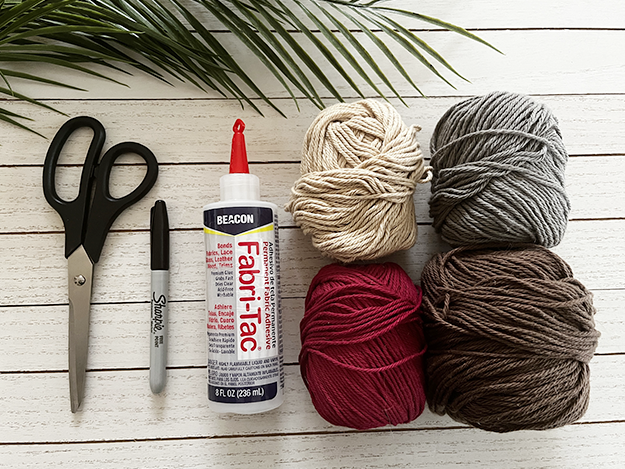
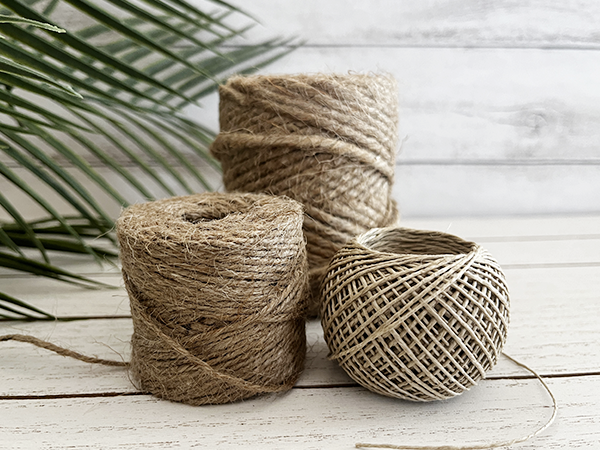
As an Amazon Associate I earn from qualifying purchases. Please read my Amazon Associates Program for more info.
Looking for a fun and easy DIY project? Try making an earthy bracelet by wrapping cotton yarn around a jute rope. To make this project, you'll need jute rope, cotton yarn, coconut shell buttons, a hemp cord, and basic craft supplies. Medium size 4 cotton yarn is recommended as it is lightweight and easy to work with. Plus, it's widely available and affordable, making it perfect for this project.

If you're interested in fundraising, making your own jewelry is a great idea. And to add a personal touch to your creations, you can make handmade tags using simple supplies. Handmade tags can really make your items stand out. In the video, I share a DIY tag idea using kraft paper (65lb./lightweight card stock), but you can use heavier-weight kraft paper like 80-100lb, or any card stock you already have.
​
I hope you enjoy creating your own earthy bracelet and experimenting with different tag ideas. Have fun with your new craft project!
Earthy coconut button and jute rope loop closure bracelets for women on a jute placemat
Tools & Materials:
  • Cotton yarn (Medium Size 4)
  • Coconut shell buttons
  • Fabric glue
  • Jute rope (4-ply #72)
  • Natural polished hemp cord (10lb.)
  • Scissors
  • Sharpie marker
  • Yarn in various colors
  • Clear nail polish (optional)
Tools & materials for DIY earthy bracelet
Jute & hemp cords
Coconut shell buttons


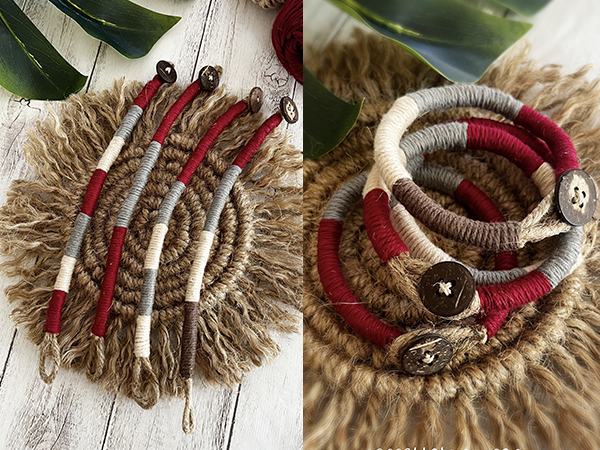
Creating earthy bracelets
Earthy cotton yarn-wrapped jute cord bracelets in three different thicknesses
Left: 27"x1 & 7.5"x2, Middle: 27"x1 & 7.5"x1, Right: 27"x1
Comparison of three earthy coconut button and jute rope loop closure bracelets for women
Left: 27"x1 & 7.5"x2, Middle: 27"x1 & 7.5"x1, Right: 27"x1
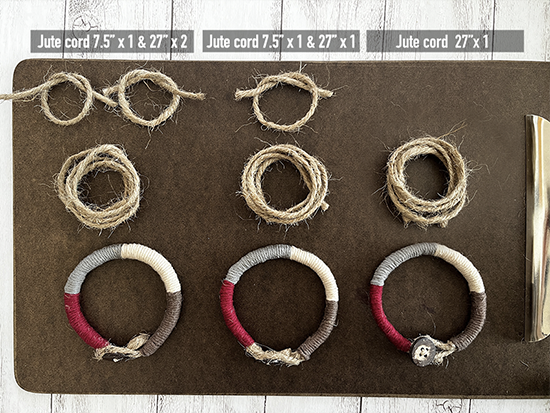
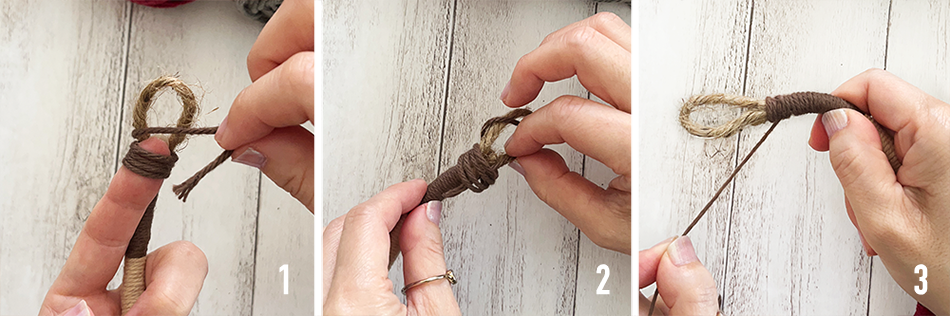
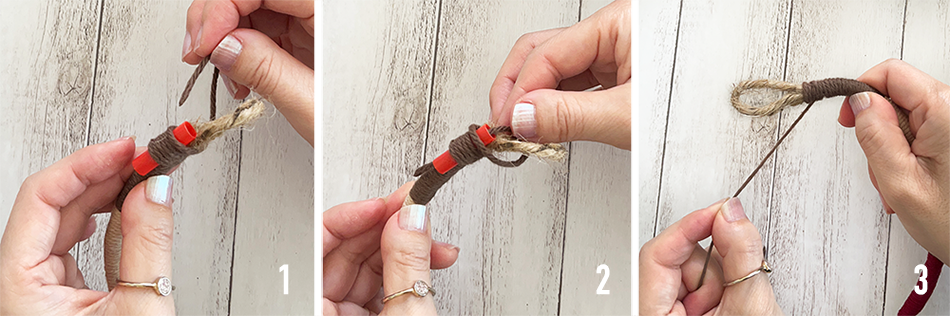
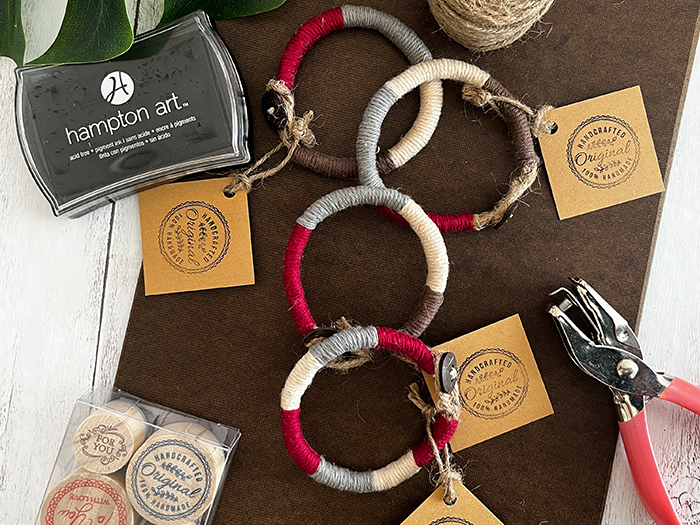
If you want a thicker bracelet, you can add more pieces of jute rope to the original piece. In the picture, you can see three different thicknesses of bracelets that were made by adding different amounts of jute rope.

Although they may look almost identical, when you touch them, you can feel the difference in thickness. By experimenting with different thicknesses, you can find the one that is just right for you. A thicker bracelet may feel more substantial and make more of a statement, while a thinner bracelet may be more delicate and subtle.

​Ultimately, the choice is yours and depends on your personal style and preferences.
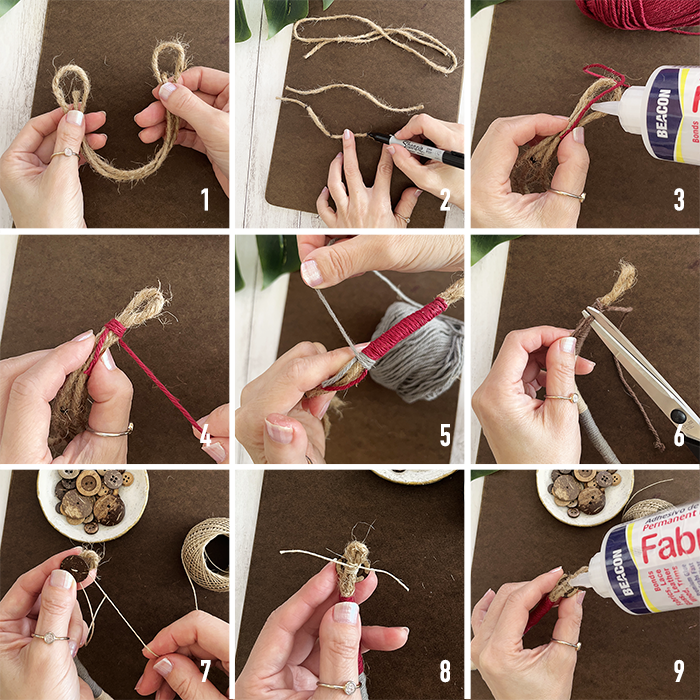
Step by step instruction for DIY earthy coconut button and jute rope loop closure bracelet
Instructions:
  1. Cut a piece of jute rope to approx. 26-28 inches, adjusting the length as necessary to fit the wrist size. Fold the jute rope into thirds and make a loop at both ends. This will create three strands for wrapping with yarn. (For a thicker bracelet, add more pieces of jute rope to the original piece.)
  2. Use a Sharpie to mark the rope as reference points as many as you want to depend on your design.
  3. Apply a small amount of fabric glue to the beginning of the yarn. 
  4. Leave roughly one inch-long yarn and place it on the jute rope. Begin wrapping yarn around the jute rope, covering the inch-long piece of yarn. Continue wrapping until you reach the desired length.
  5. Cut the excess yarn, leaving an inch or so. Repeat steps 3-4 with different colored yarn to create a pattern or design on the bracelet. You don't have to apply fabric glue each time you change the color, however, doing so can create a harder and more solid bracelet. 
  6. Tie the cord end. (See the pictures below)
  7. Attach a coconut shell button to one end of the bracelet using a hemp cord.
  8. Tie a knot to secure the button to the bracelet.
  9. Apply fabric glue to the knot to secure it. 

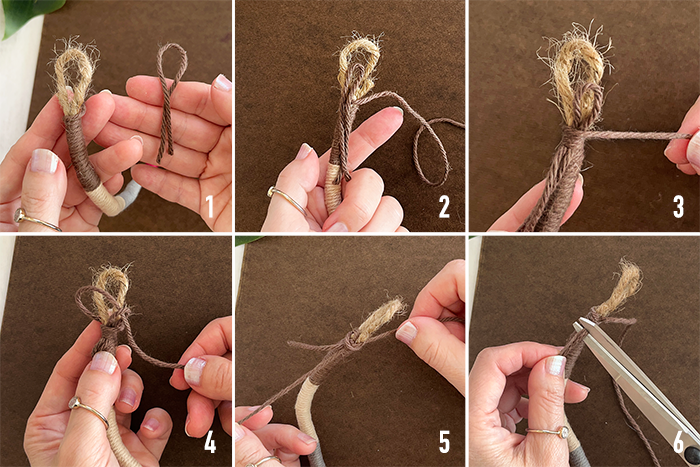
Your DIY earthy button and loop closure bracelet is now complete and ready to wear!

Tip: Apply a small amount of clear nail polish to the ends of the jute rope to prevent fraying.
(Optional: See the pictures below)
Tying the cord end
Wrap the cord end around a finger and thread through loops to secure the bracelet.
Using a finger
  1. Wrap the cord end around a finger 4-5 times and create small loops.
  2. Thread the cord end through the loops. 
  3. Pull it tight. Cut the excess cord.​
Secure the bracelet by wrapping the cord end around a short straw and threading it through loops
Using a short straw
This method is similar to using a finger, but you will use a short straw instead.
​
Secure the bracelet with another piece of yarn by creating loops and wrapping the cord around the jute rope and the yarn piece.
Using another piece​
  1. Cut another piece of yarn (approx. 5 inches long) and create a loop.
  2. Place the yarn piece on the jute rope.
  3. Wrap the cord around the jute rope and the yarn piece 4-5 times,
  4. Thread the cord end through the loop.
  5. Pull the cord tight, making sure the loops are even and tightly secured.
  6. ​Cut off any excess cord. 
Feel free to experiment with these three different methods to find the one that works best for you. 

Preventing Jute Rope from Fraying with Clear Nail Polish (Optional) 
Creating DIY jute rope bracelet end with protective clear nail polish coating
DIY bracelet end with clear nail polish coating to protect jute rope from fraying
  1. Dip the brush of the clear nail polish into the bottle and remove any excess polish.
  2. Apply the nail polish to the ends of the jute rope, making sure to cover the entire area.
  3. Use a paper towel to remove any excess nail polish if necessary. Wait for the nail polish to dry completely before handling the bracelet.

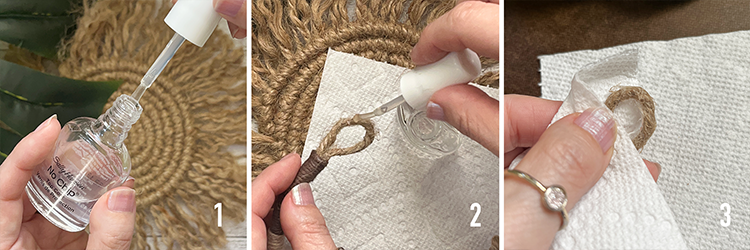
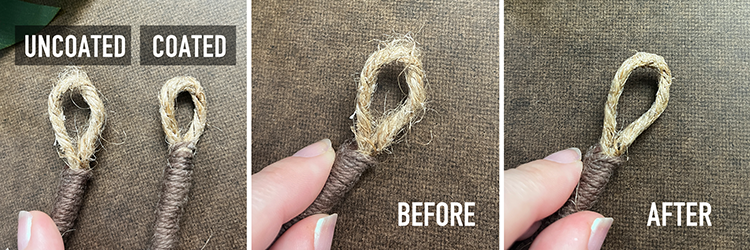
Creating simple handmade tags
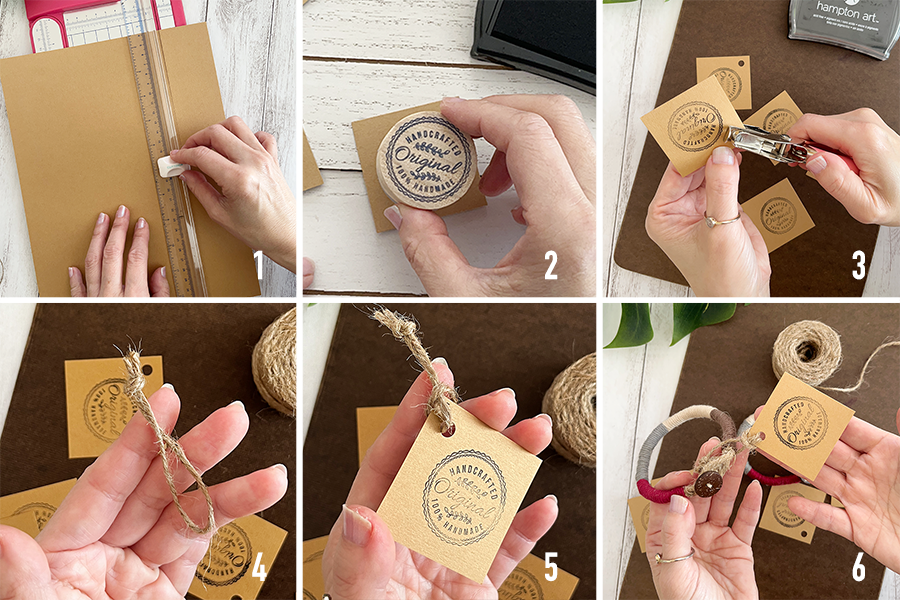
Bohemian-style DIY bracelets and handmade tags in earthy red tones
Tools & Materials:
  • Ink pad
  • Jute cord (2mm)
  • Kraft paper (65lb. or heavier)
  • Paper trimmer
  • Scissors
  • Stamp set
DIY tag instructions using stamp set and jute cord
Instructions:
  1. Cut a piece of kraft paper to the desired shape and size using a paper trimmer or scissors. For this project, I recommend a 2 x 2-inch square. Using a paper trimmer will make it easier to cut a straight line. I used 65lb. kraft paper, however, you can use heavier-weight kraft paper like 80-100lb. or any card stock if you already have one. When the paper gets thicker, it's a little harder to punch a hole. But if it is thin, the tag gets bent easily. 65lb. is the minimum in my opinion.
  2. Using a stamp set, stamp a design onto the paper using an ink pad. You can choose any design you like.
  3. Use a hole punch to make a hole in one of the corners of the tag. Make sure the hole is large enough to fit the jute cord. 
  4. Cut a piece of jute cord to approximately 7-8 inches in length. Tie a knot at one end of the cord. 
  5. Thread the other end of the cord through the hole in the tag, and loop it back through the knot. 
  6. Attach the tag to the bracelet. 

And there you have it! With just a few simple steps, you can create beautiful handmade tags for your DIY bracelets. Happy crafting!

​​Please note that any crafts or DIY projects should be attempted with caution.
0 Comments


Leave a Reply.

    Author


    Picture

    Archives

    January 2025
    November 2024
    November 2023
    October 2023
    September 2023
    August 2023
    July 2023
    June 2023
    May 2023
    April 2023
    March 2023
    December 2022
    April 2022
    December 2021
    November 2021
    October 2021
    March 2020
    January 2020
    October 2019
    July 2019
    March 2019
    July 2015

    Categories

    All
    Jute Crafts
    Sustainable Crafts

    RSS Feed

Proudly powered by Weebly