ACCESSORY-MU Handcrafted Jewelry, Crafts & Graphic Design
  • Home
  • Graphic Design
  • Blog
  • Published Work
  • GIF
  • Downloads
  • Terms of Use
  • About
  • Privacy Policy
  • Home
  • Graphic Design
  • Blog
  • Published Work
  • GIF
  • Downloads
  • Terms of Use
  • About
  • Privacy Policy

BLOG


Chic and Simple: DIY Shade of Red Yarn-Warpped Bead Necklace Tutorial Guide

11/25/2023

0 Comments

 
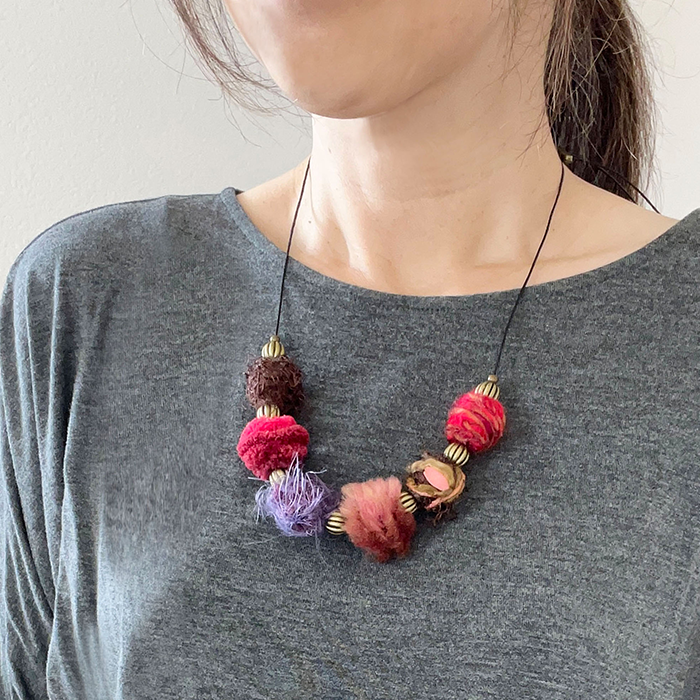
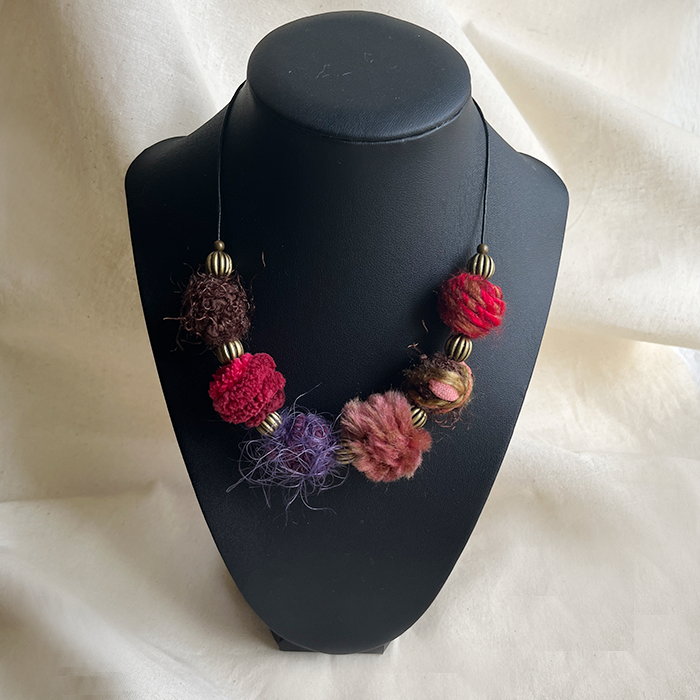
As an Amazon Associate I earn from qualifying purchases. Please read my Amazon Associates Program for more info
Dive into the world of DIY creativity with this guide on crafting a cozy and unique necklace adorned with shades of red yarn-wrapped beads. This simple yet elegant project combines the warmth of red hues with the durability of 1 mm waxed cotton cord, resulting in a unique accessory that reflects your personal touch. Join me on this crafting journey and discover the joy of handmade beauty.
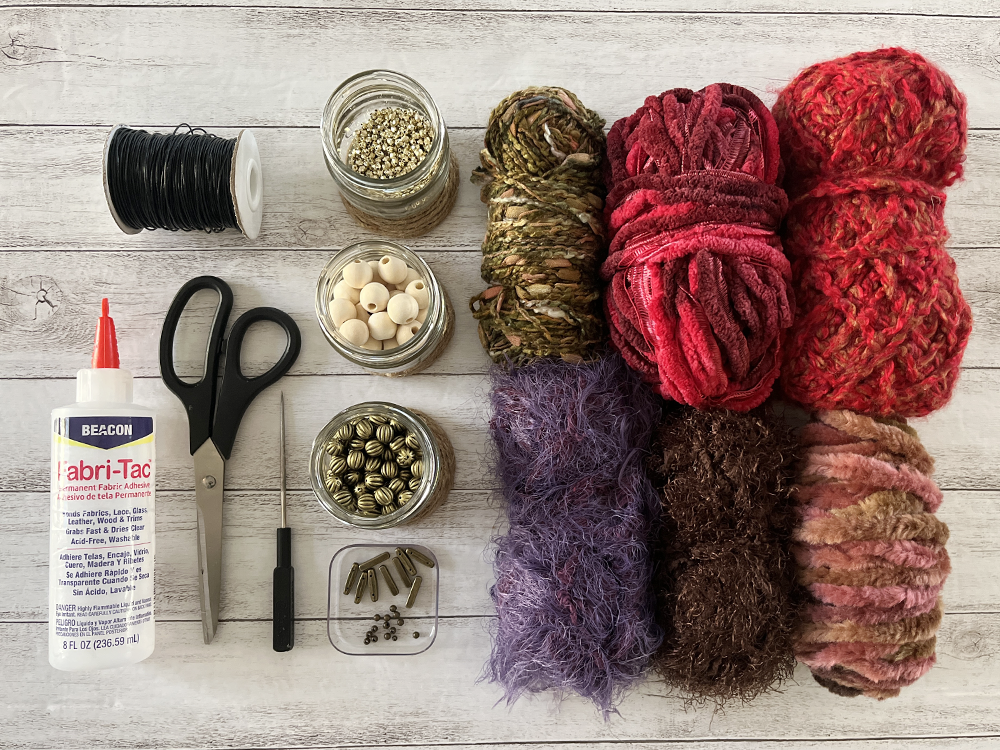
Picture

Tools & materials for colorful yarn-wrapped bead necklace
Supplies:
  • Acrylic metallic faceted beads (color: gold) - 4 mm
  • CCB beads by Bead Landing™ (color: antique brass, copper coated plastic) - 10 mm round ​
  • Oxidized Brass 2 Hole Metal Spacer Bar Bead by hildie & jo
  • Metal beads - 4 mm oxidized brass round
  • Natural wood beads - 15 mm: https://amzn.to/3T0RJOE
  • Bead reamer
  • Nail Polish (clear)
  • Fabric glue: https://amzn.to/47qnGnI​
  • Scissors
  • Pliers (Optional): https://amzn.to/3uytayi
  • Yarn in various colors
  • Waxed cotton cord - 1 mm: https://amzn.to/3Rh6ono

Creating Yarn Ball Beads
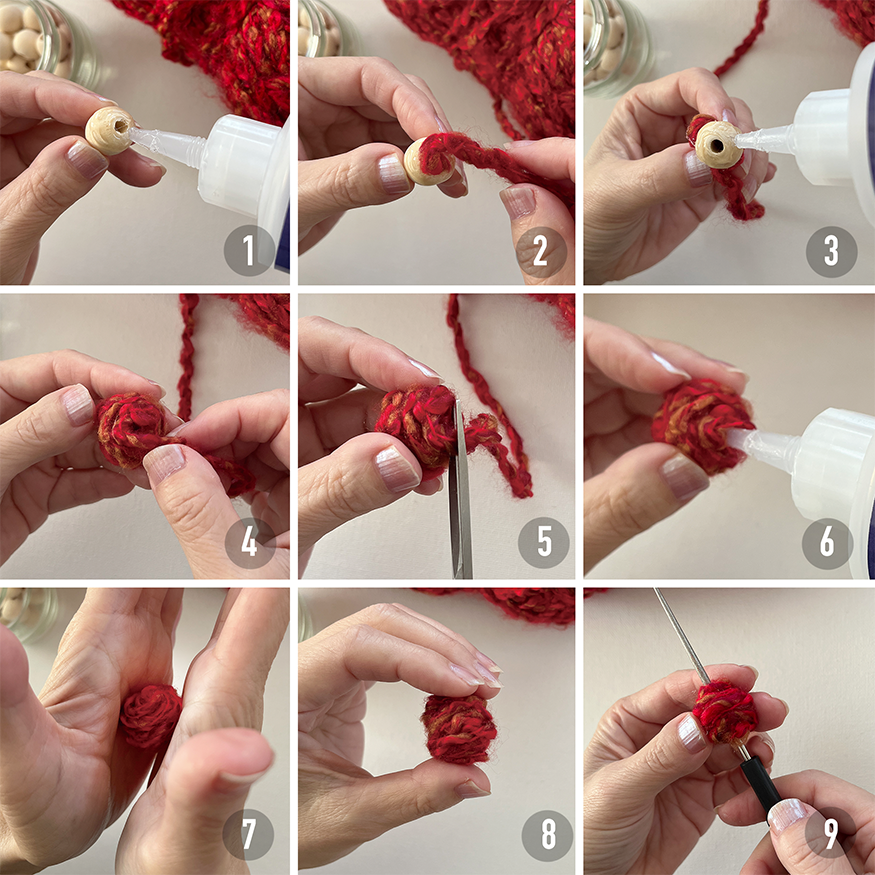
Red Yarn-Warpped Bead tutorial step-by-step instructions
Instructions:
  1. Apply fabric glue to the top half of the wooden bead.
  2. Wrap the yarn around the glued portion of the wooden bead.
  3. Apply glue to the remaining half.
  4. Continue wrapping yarn around the wooden bead until it is completely covered. 
  5. Trim any excess yarn. 
  6. Apply more glue for durability if necessary.
  7. Gently roll the yarn-wrapped bead between your palms for a smooth and secure finish.
  8. Allow the yarn ball beads to dry completely.
  9. If yarn covers holes, use a bead reamer to create openings cautiously.​

Experimenting with Colors and Textures
 Yarn-wrapped wooden beads showing different colors and textures
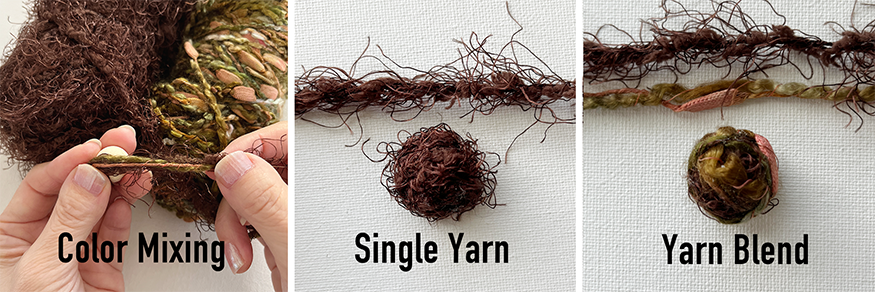
You can explore blending two different colors and/or textures to craft unique and personalized beads.

Diversify your collection by crafting additional beads using various colors and textures of yarn. For this project, aim to create six yarn beads to fashion a complete and vibrant necklace. ​

 Assembling Adjustable Cord Necklace ​
Red Yarn-Warpped Bead Necklace tutorial step-by-step instructions
Instructions:
  1. Start by cutting a piece of black waxed cotton cord to a length of 34 inches.
  2. To prevent the cord from fraying when threading through beads multiple times, apply a small amount of nail polish (or glue) to the cord's end. (Optional)
  3. Collect the following beads: seven 10-mm CCB round beads, six yarn beads, two 4-mm metal round beads (oxidized brass), two 4-mm acrylic faceted beads (color: gold), and one oxidized brass 2 hole metal spacer bar bead.
  4. Thread one 4-mm metal round bead (oxidized brass), 10-mm CCB round bead and a yarn ball bead onto the waxed cotton cord.
  5. Repeat this pattern, excluding the 4-mm metal bead. Add one 4-mm metal bead at the end.
  6. Take an oxidized brass 2 hole metal spacer bar bead. Thread each cord end through one hole of the spacer bar bead.
  7. Thread one 4-mm acrylic faceted bead onto each cord end.
  8. Tie a knot on each cord end to secure the beads and spacer bar.
  9. So there you have it, your very own one-of-a-kind necklace. A touch of warmth, a dash of elegance, and a whole lot of you. Enjoy wearing it or gifting it to spread the joy of handmade creativity.

Alternative methods to finish cord ends
There are alternative methods to finish cord ends. While this project utilizes an adjustable cord closure with a 2-hole spacer bar bead, you have the flexibility to use crimp cord end caps or tie knots for a cord loop closure.​
​Crimp Cord End Closure
​Jewelry Crimp Cord End Closure step by step instruction guide
​Crimp Cord End Closure:
​Secure cord ends with bead crimps for a polished finish. Slide a bead crimp onto each cord end. Use pliers to flatten the crimps, securing the cords in place. Trim any excess cord.

Loop Closure
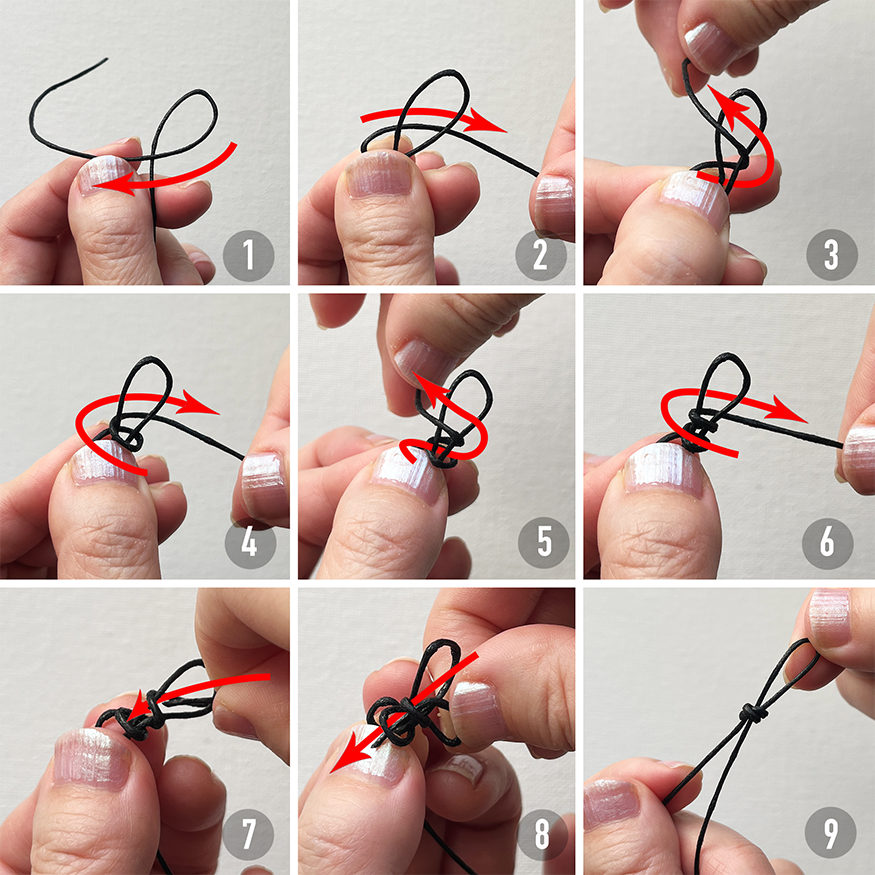
Waxed cotton jewelry cord loop closure step-by-step instruction guide
Loop Closure:
​Create a loop at the cord end. Wrap the shorter cord around the base twice. Thread it through the two loops from top to bottom. Pull tight to secure, ensuring a snug knot. 

Jewelry cord end closure options
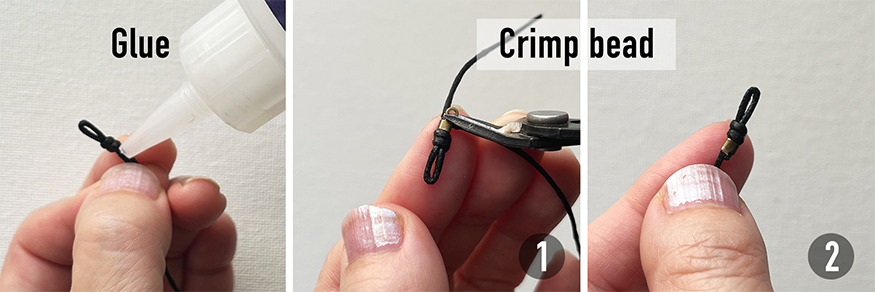
Glue: Trim any excess cord and use jewelry glue to reinforce and secure the loop ends.

Crimp beads: Alternatively, you can opt for crimp beads to provide additional stability, securing them just below the knot for a polished finish.

​​​
​​Please note that any crafts or DIY projects should be attempted with caution.
Woman wearing a shade of red yarn-wrapped statement necklace
Shade of red yarn-wrapped statement necklace
Shade of red yarn-wrapped necklace on a book
Explore necklaces & earrings with the same style as yarn-wrapped bead necklace, but with different colors and textures for a unique look.

Same Style Necklace: DIY Adjustable Statement Necklace with Yarn-Wrapped Ball Beads
​
Same Style Earrings: DIY Earrings Tutorial - Yarn-Wrapped Magic: Creating Unique Wooden Bead Earrings
Same Style Necklace: DIY Adjustable Navy Cord-Wrapped Large Ball Bead Statement Necklace - Jewelry Making at Home
Same style Earrings: Easy DIY Navy Cord-Wrapped Ball Bead Earrings: A Step-by-Step Guide​
0 Comments


Leave a Reply.

    Author


    Picture

    Archives

    January 2025
    November 2024
    November 2023
    October 2023
    September 2023
    August 2023
    July 2023
    June 2023
    May 2023
    April 2023
    March 2023
    December 2022
    April 2022
    December 2021
    November 2021
    October 2021
    March 2020
    January 2020
    October 2019
    July 2019
    March 2019
    July 2015

    Categories

    All
    Jute Crafts
    Sustainable Crafts

    RSS Feed

Proudly powered by Weebly